UV DTF transfer offers durable, vibrant prints on apparel and fabrics. This introductory guide covers UV DTF transfer steps, how to apply DTF transfer, DTF transfer troubleshooting, heat pressing DTF transfers, and UV DTF transfer guide. You’ll learn how to prepare artwork, choose print settings, align designs, and perform post-press care to ensure sharp details and color fidelity. By blending the flexibility of traditional DTF with the quick curing of UV inks, this method delivers a smooth hand-feel and accurate color reproduction. Whether you’re new to DTF or upgrading an existing workflow, these practices set you up for consistent, professional results.
Viewed from another angle, this modern fabric-printing approach uses UV-curable inks on a transfer film to embed designs into textiles with crisp detail. LSI-friendly terms such as digital textile transfer, UV ink film method, and film-to-fabric application help connect related concepts like color fidelity, durability, and rapid curing. Whether you search for UV DTF transfer steps, how to apply DTF transfer, or heat pressing DTF transfers, the core workflow—design prep, printing, alignment, press timing, and post-care—remains consistent.
UV DTF transfer steps: a step-by-step overview
UV DTF transfer steps combine the precision of digital design with the speed of UV-curable inks to produce vibrant, durable prints on fabrics. This overview emphasizes the sequence from artwork preparation to final curing, highlighting how UV inks cure quickly and resist smudging, while providing sharp detail and color depth. By following these steps, you can maintain color fidelity and edge clarity across diverse substrates and garment types.
A structured workflow helps streamline production and troubleshoot issues early. Adhering to a consistent set of steps—from design optimization and proper file setup to printing, pre-press, alignment, heat pressing, and post-press care—reduces variability and increases repeatability. This approach also makes it easier to compare results across different films, inks, and heat-press profiles, ensuring reliable results over time.
UV DTF transfer guide: tools, materials, and setup
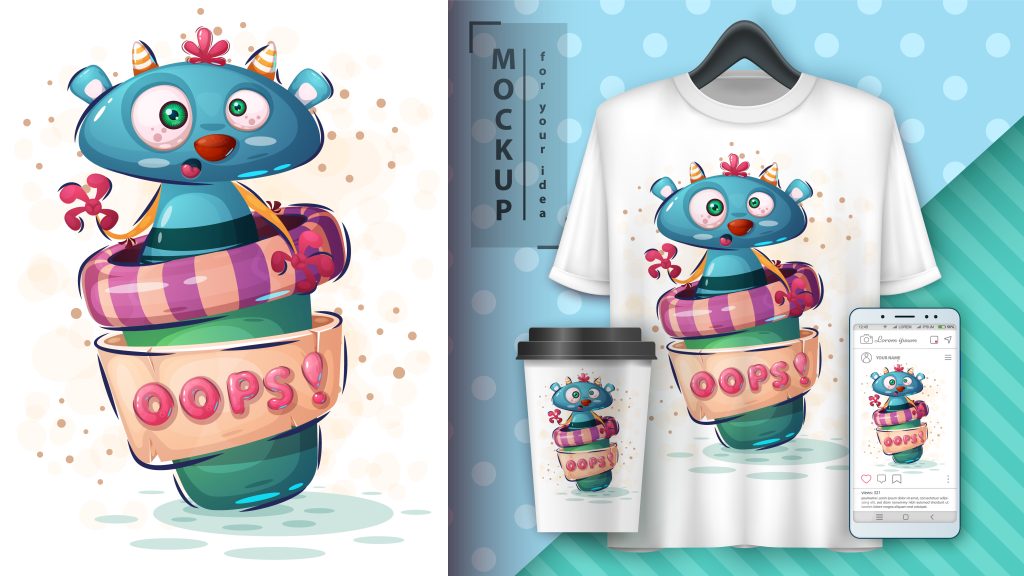
Before you start, assemble the essential tools and materials for UV DTF transfer projects: UV DTF transfer film and a compatible carrier sheet, a UV-curable ink printer, a heat press with even platen pressure, protective teflon or parchment, heat-resistant gloves, lint-free cloth, and a squeegee or burnishing tool. This UV DTF transfer guide also calls out garments suitable for DTF transfers, such as cotton or poly-cotton blends, and software for design prep, mirroring if required, and color management.
A well-prepared setup reduces handling errors and improves alignment. Confirm printer profiles are tailored to the chosen film and ink, and ensure the heat press temperature control is accurate. Set aside clear work areas and use guides or a light source to verify design placement before pressing. By establishing a clean, repeatable setup, you’ll minimize misalignment and maximize color vibrancy on every run.
Design considerations for UV DTF transfer steps
The design phase is critical for UV DTF transfers, as UV inks capture fine linework and text with excellent clarity. Start with high-resolution artwork, clean edges, and careful attention to white areas, since some films handle white ink differently. Create mock-ups on the actual garment or substrate to verify scale, spacing, and predict how the design will look after transfer.
During preparation, plan for mirroring decisions based on printer behavior and film instructions. High-contrast designs with thin lines benefit from crisp vector edges and minimal rasterization. By anticipating how the film responds to light and heat, you can adjust line weights, color separations, and underlays to preserve readability and depth after the transfer is complete.
How to apply DTF transfer: practical tips for accuracy and alignment
If you’re wondering how to apply DTF transfer, the key is precise placement and stable handling from start to finish. Use alignment aids, such as guides, a clipboard system, or a light source to ensure the design faces the correct direction and sits flat. Small movement during pressing can cause ghosting or edge misalignment, so secure the transfer firmly before applying heat.
Consider the orientation and substrate texture when planning placement. A slightly textured fabric or ribbed surface may require extra pressure or a longer dwell time within recommended guidelines. Practicing on scrap pieces or similar fabrics helps you build confidence in achieving consistent, professional results across varying garment types.
DTF transfer troubleshooting: common issues and fixes
DTF transfer troubleshooting covers typical problems like ghosting, color bleeding, and poor adhesion. Ghosting can stem from misalignment, insufficient curing, or ink not drying completely; re-check the print resolution, use higher-grade film, and verify that pressure is evenly distributed across the entire design area.
Additional issues such as dull whites, edge cracking, or color shifts on dark fabrics often point to film compatibility, ink density, or substrate readiness. Adjust curing times, confirm pre-press moisture removal, and ensure the garment is flat and free of folds. Documenting the exact conditions for each run helps you quickly identify root causes and implement reliable fixes.
Heat pressing DTF transfers: best practices for durable results
Heat pressing DTF transfers requires careful control of temperature, time, and pressure to maximize durability and color fidelity. A common target range is 300–320°F (150–160°C) with medium to firm pressure for about 10–15 seconds, adjusted for larger areas or intricate designs. Using a teflon sheet or parchment between the transfer and substrate helps prevent scorching and promotes even heat distribution.
Post-press care is essential for longevity. Peel the carrier sheet according to the film’s instructions (hot or cold peel) and allow the print to cure fully before washing. Implement inside-out washing with mild detergent and avoid high heat in the first few wash cycles. Following these heat pressing best practices consistently yields crisp details, strong adhesion, and color stability over time.
Frequently Asked Questions
What are the essential UV DTF transfer steps to achieve reliable results?
Follow these UV DTF transfer steps: prepare your artwork at high resolution and decide if mirroring is needed for your film; print with UV-curable inks using the correct color profile and allow proper curing time; pre-press the garment to remove moisture; align the transfer precisely with the design facing down; apply heat at the recommended temperature, pressure, and time; remove the carrier sheet as directed (hot or cold peel); and finish with post-press curing and proper garment care.
How to apply UV DTF transfer to fabric correctly?
To apply a UV DTF transfer correctly, start with accurate alignment using guides, place the transfer on the substrate with the design facing down, and prepare the garment with a quick pre-press. Use the heat press at about 300–320°F (150–160°C) for 10–15 seconds with medium to firm pressure, protected by a teflon or parchment sheet. After pressing, peel the carrier sheet as instructed (hot or cold peel) and allow the print to cure fully before washing.
What DTF transfer troubleshooting tips apply to the UV DTF transfer?
Common UV DTF transfer issues include ghosting, color bleeding, poor adhesion on dark fabrics, dull white areas, and edge cracking. Fixes include verifying print resolution and alignment, using high-quality film and correct curing time, pre-pressing to remove moisture, choosing appropriate primer or underlay for dark fabrics, and ensuring even, clean surfaces before pressing.
What are the heat pressing guidelines for DTF transfers using UV inks?
Heat pressing guidelines for DTF transfers with UV inks: maintain 300–320°F (150–160°C), press 10–15 seconds with medium to firm pressure, use a teflon or silicone protective sheet, and pre-press to flatten the substrate. Inspect edges after pressing and ensure full adhesion, avoiding transfers over folds or seams.
Is there a UV DTF transfer guide for beginners?
Yes, a UV DTF transfer guide for beginners covers design prep, film choice, mirroring needs, printing profiles, and test runs on swatches. Start with mock-ups on the actual garment, use high-resolution artwork, and gradually adjust color management and heat settings according to the film and ink you use.
How should I care for and store UV DTF transfers after application?
For care and storage after UV DTF transfers, cure fully before washing, wash inside-out with a mild detergent, and avoid high heat on first washes. Store transfer films in a cool, dry place, flat or rolled with even tension, and refer to the UV DTF transfer guide for product-specific storage instructions.
| Topic | Key Points |
|---|---|
| What is UV DTF transfer | Direct-to-Film transfer using UV-curable inks; prints on a dedicated film and is heat-transferred to fabric, delivering fast cures, vivid colors, fine detail, and a smooth hand-feel. |
| Tools, materials & preparation | UV transfer film and carrier sheet; UV-curable ink printer; heat press with even pressure and accurate temp; protective sheets; gloves, lint-free cloth, squeegee; appropriate substrates; design software with cropping/mirroring/color management. |
| Core steps (high level) | Prepare artwork; print transfer; pre-press substrate; align transfer; apply heat; remove carrier sheet; post-press care and curing. |
| Step-by-step details (summary) | Step 1 — design/prep; Step 2 — print using UV inks; Step 3 — pre-press substrate and align; Step 4 — heat press at ~300–320°F (150–160°C) for 10–15s; Step 5 — peel/finish; Step 6 — post-press cure and care. |
| Troubleshooting & common issues | Ghosting or faint edges; color bleeding; poor adhesion on dark fabrics; dull whites; edge cracking. Solutions: verify resolution, alignment, fabric compatibility, curing time, and proper pre-press and handling. |
| Best practices for heat pressing | Temperature: 300–320°F (150–160°C); Time: 10–15s; Pressure: medium to firm; Use teflon/parchment; pre-press to remove moisture; inspect edges for complete adhesion. |
| Care, maintenance & storage | Store films cool and dry; keep films flat or rolled with even tension; wash inside-out with mild detergent; avoid high heat during washing/drying; re-check curing times if color fades. |
Summary
Conclusion paragraph will follow the table, providing a descriptive overview of UV DTF transfer and its practical applications.